iPad as a wireless second screen on Linux
Published:
Motivation
In these times, having your home be your place of work is the new norm for many. My partner and I are in this boat. While we have a lovely shared office, it is, well, a shared office. In the before times, this worked great as we were fortunate enough to have flexible schedules where only one of us would be in there, while the other was working “off-site”. Now, we are pretty much both working from home most of the time.
I have found myself working from various couches/chairs/beds/tables with a laptop during this time. This works, but having a second screen would make life a bit easier. So, I started looking for a way to repurpose an ipad as a second screen to pair with my laptop.
Setting this up was actually a lot easier than I had expected. I’m writing this down for my future self, but hope that it might also be helpful to others.
How to
Hardware
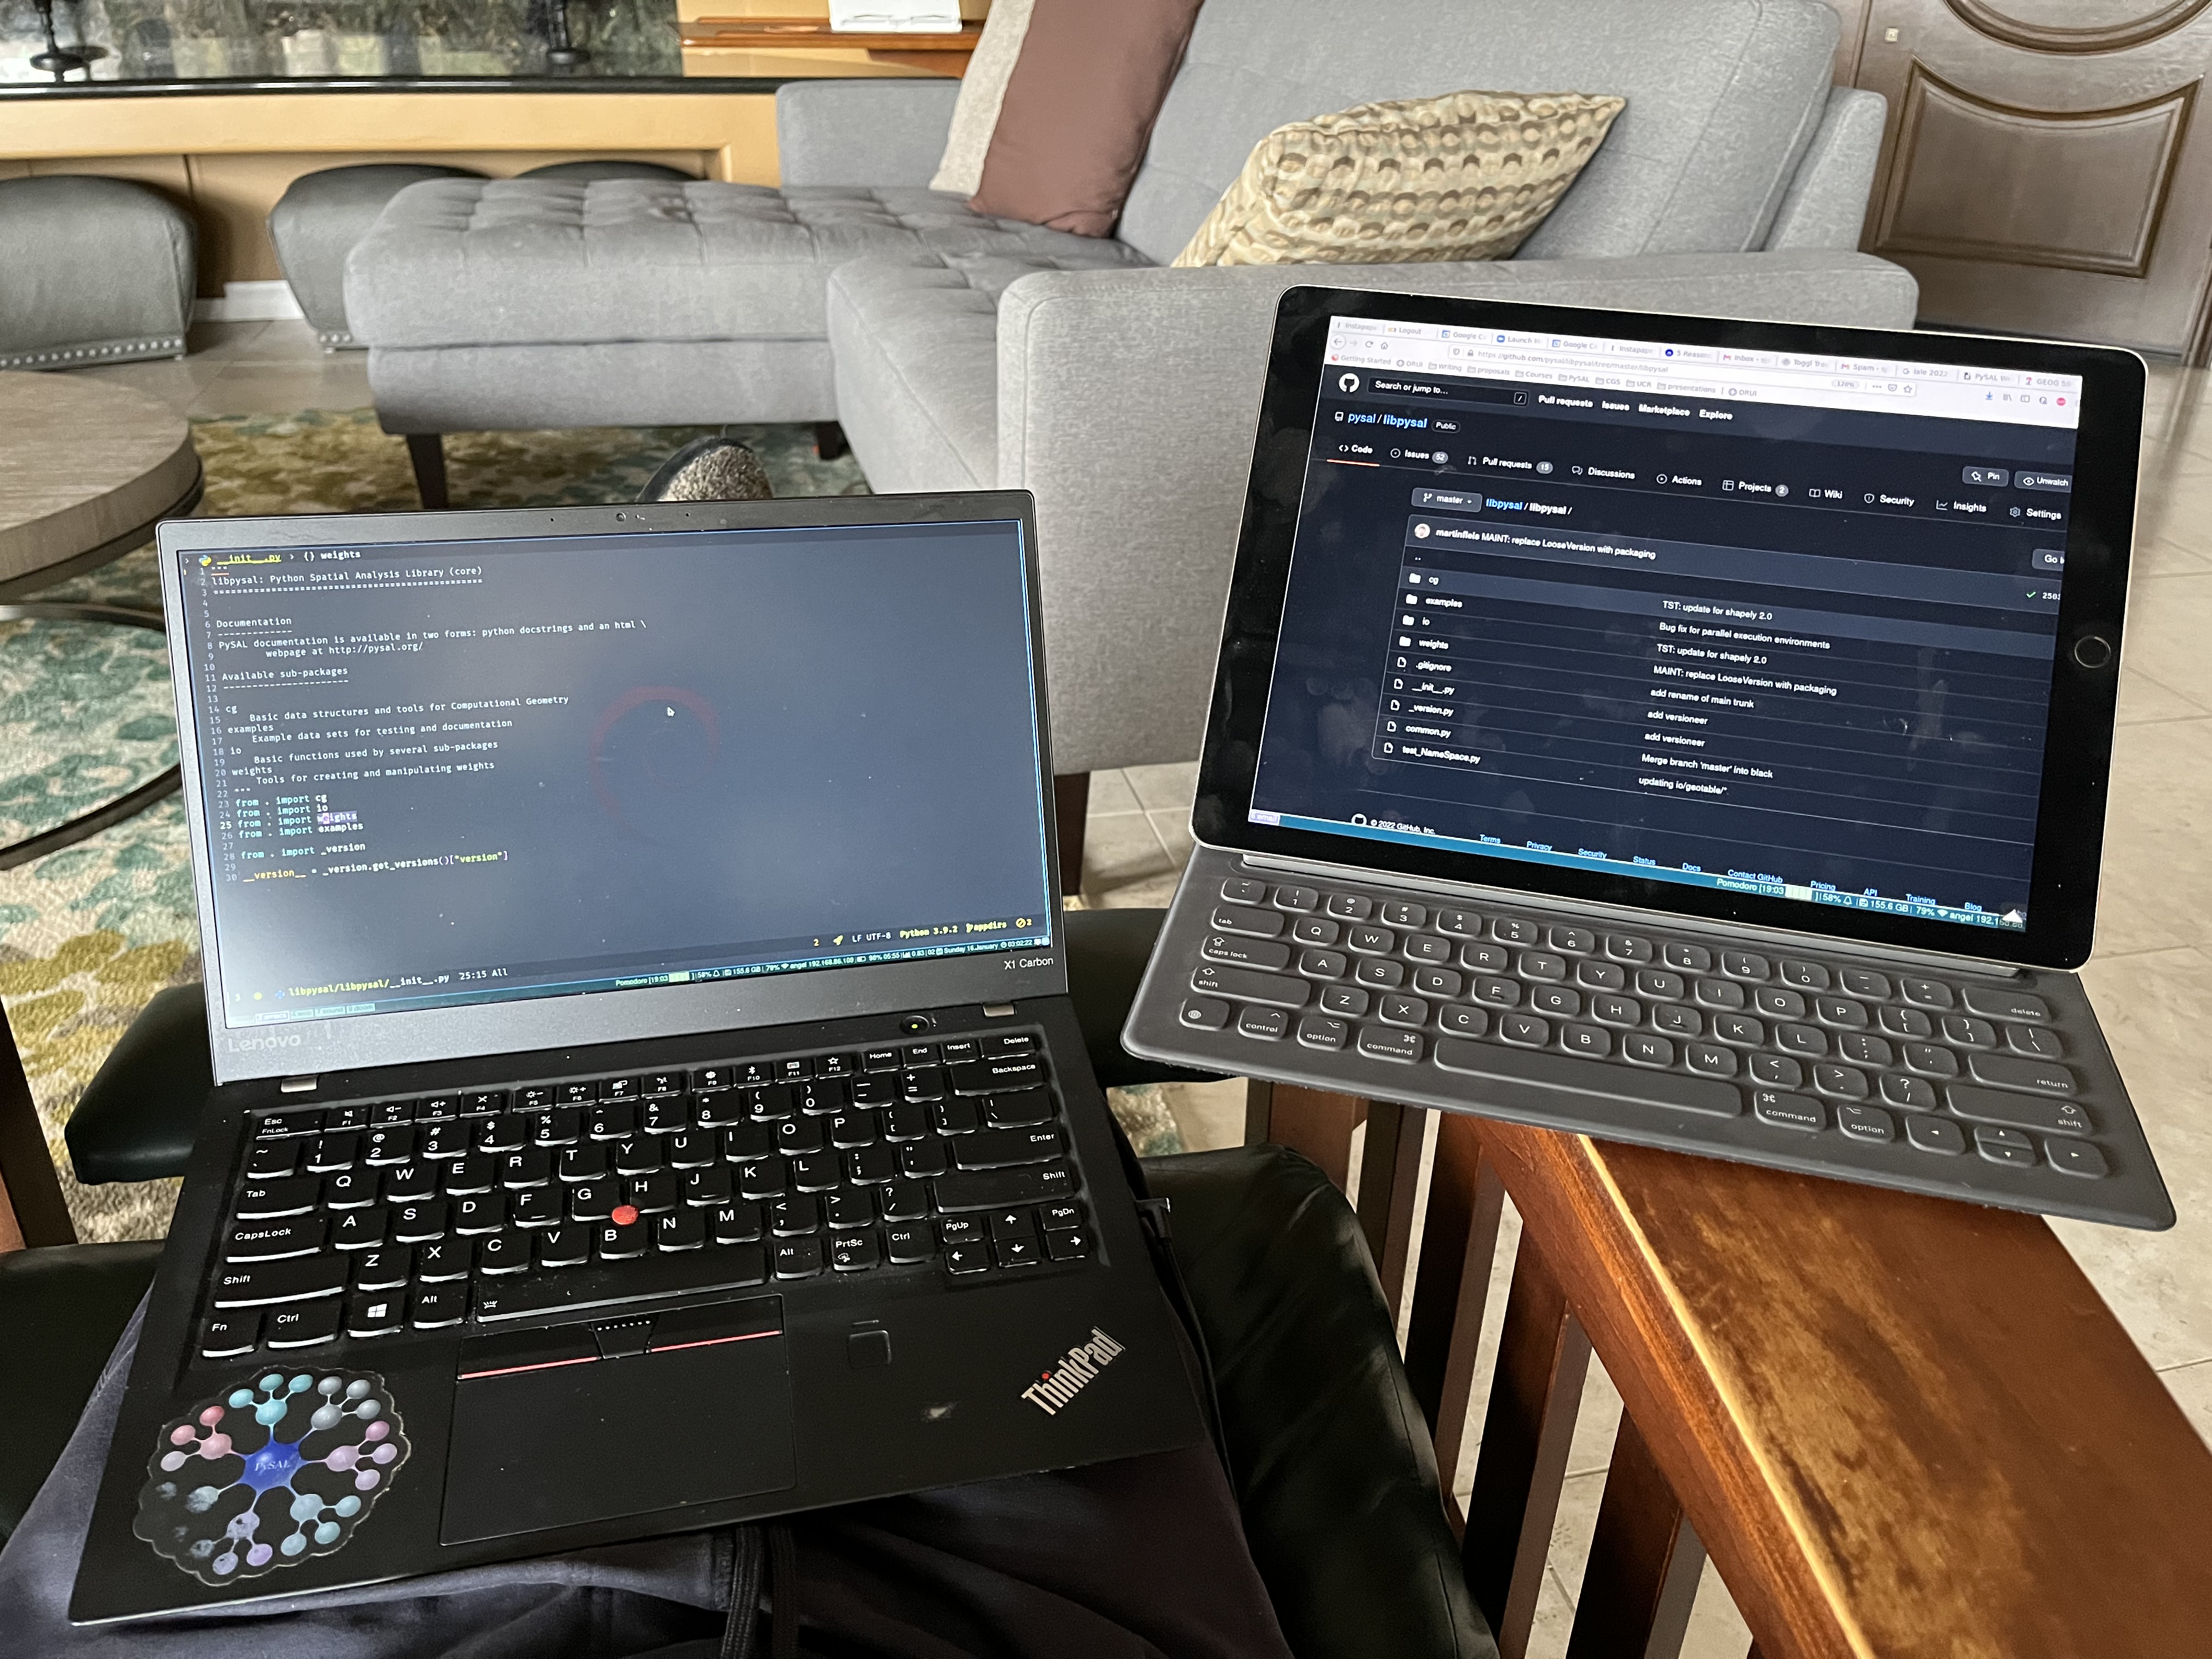
Laptop
dmidecode | grep -A3 '^System Information'

System Information
        Manufacturer: LENOVO
        Product Name: 20HRS14W00
        Version: ThinkPad X1 Carbon 5th
(base) ☁  ~  lsb_release -a
No LSB modules are available.
Distributor ID: Debian
Description:    Debian GNU/Linux 11 (bullseye)
Release:        11
Codename:       bullseye
ipad
Setup
The first step is to create the file /etc/X11/xorg.conf.d/20-intel.conf with the contents:
Section "Device"
  Identifier "Intel Graphics"
  Driver "intel"
  Option "TearFree" "true"
  Option "VirtualHeads" "1"
EndSection
Note that this X1 only has integrated graphics.
To register the new screen, it is necessary to reboot the X1 at this stage.
Next, we create a new mode that we will use for this screen. The command cvt 1920 1080 will generate the required parameters. Copy the output and then pass into a call to xrandr:
xrandr --newmode "1920x1080_60.00"  173.00  1920 2048 2248 2576  1080 1083 1088 1120 -hsync +vsync
xrandr --addmode VIRTUAL1 1920x1080_60.00
Now, start the vnc server with x11vnc.
With the linux laptop ready, the next step is to install a VNC client on the ipad. I’m using Mocha VNC.
You will need the ip of the vnc server, which you can get with ip address.
In the VNC client on the ipad, add that ip. Your configuration should look something like this:

With this done, hitting “Connect” in the Mocha app should establish the connection.
Notes
Points to keep in mind.
- Both the laptop (server) and client (ipad) have to be on the same wireless network.
- I’m the only one in my home connecting to the server. You may want to add more security depending on your circumstances.
- In place of VNC, you could also use something like deskreen. I did try this, got it working, but it is cpu intensive on the X1. VNC had a lighter footprint so I use that.
- I’m using i3 as my daily driver. I’ve also tested this with the default gnome on debian.